Thursday 20 May 2010

Beat Box Project Evaluation (PART 2)

3. Testing and feedback

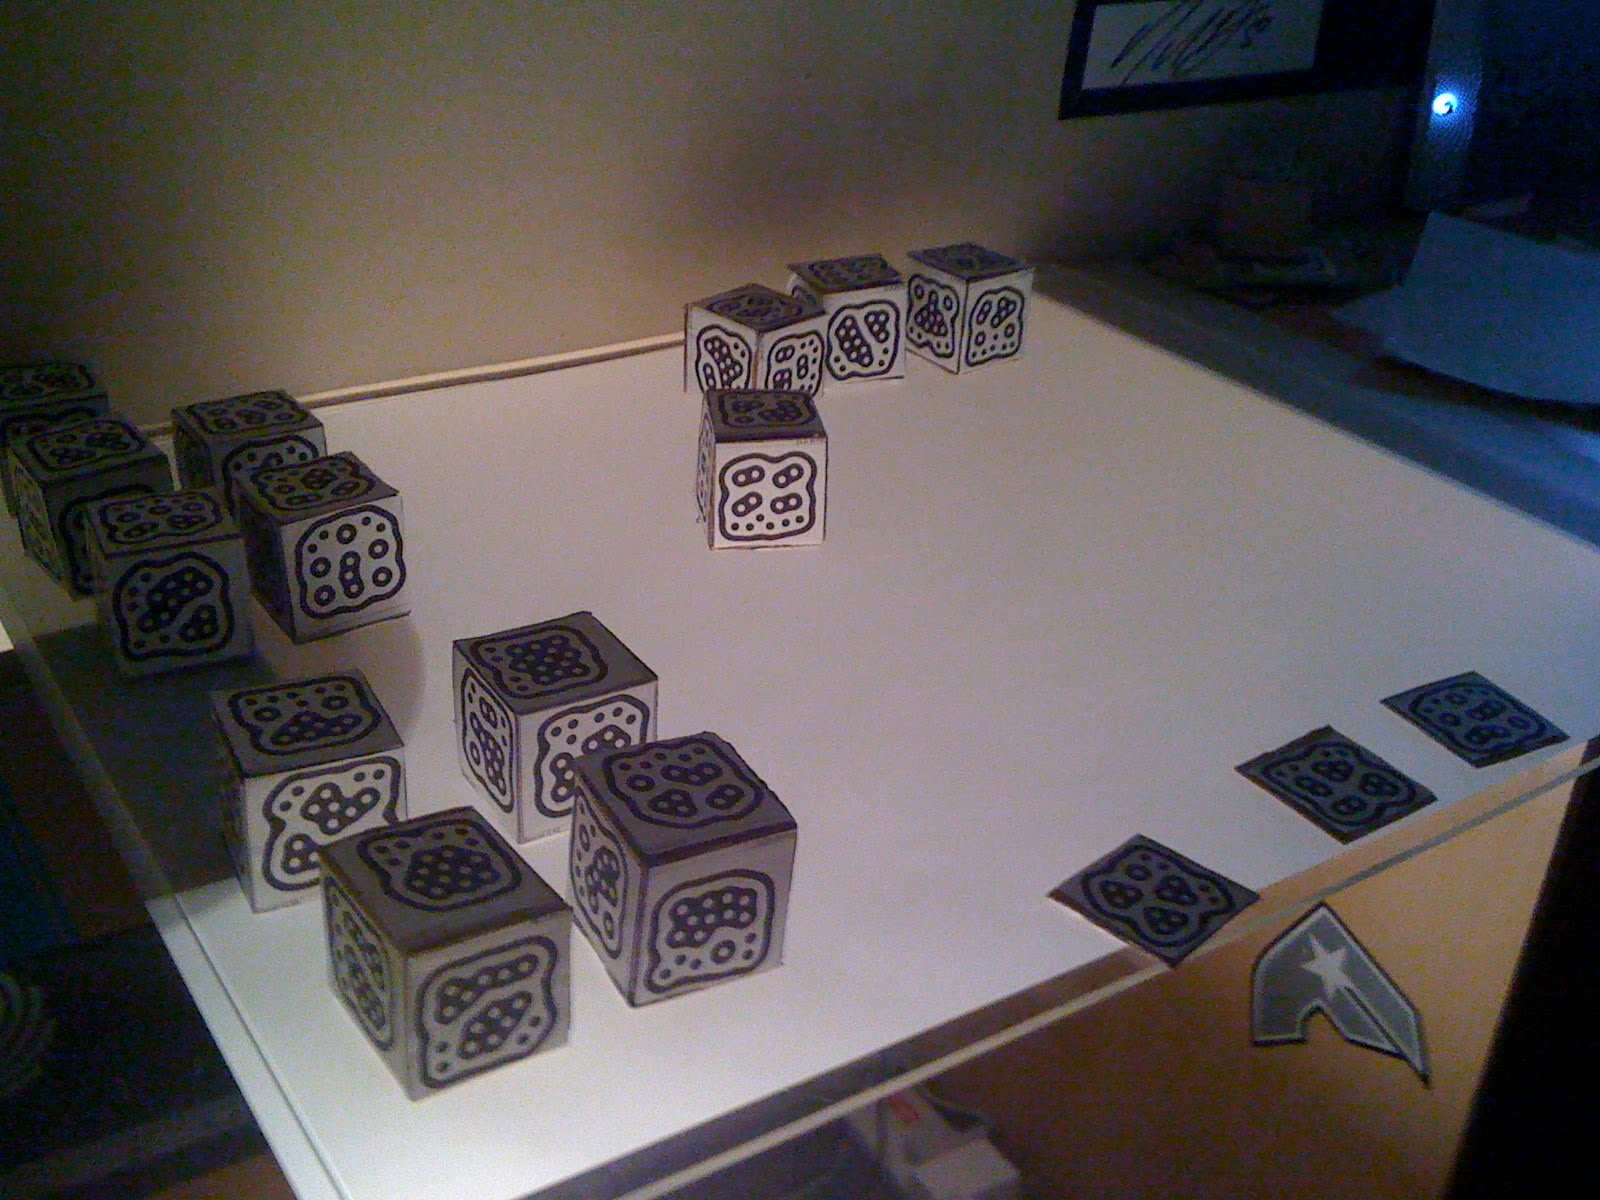
Throughout this project people such as family members and university students have conducted user testing on a regular basis. The main areas to user test were the overall height requirements needed for the box, as I wanted it to be targeted towards a more adult aged user group. Tangibility was a huge factor to consider and work out how exactly I was going to go about making this a key aspect. I went for the Cube option on the table due to seeing the official Reactable Project work so well with it. They are easy to pick up and they also give me a much larger number of fiducials to work with due to them having 6 faces.


My project was kept on the quiet for the most case until it was built to a testing standard. So when the box was built (not painted) and some mock up cubes were made I took it into university and let a group of second year and third year students have a play.


I asked the students what they thought of the overall usability and they all seemed more than happy with it. They all agreed it took a few minutes to grasp what to do but that is the generally idea of the piece – to experiment with music with almost no instructions. So I feel I have hit my target head on and achieved exactly what I planned for. Other than that day at the university I haven’t really had anybody else text my product but I prefer the surprise to be honest.


4.Evaluation and Appraisal


Self-Appraisal:


I feel that throughout this project I have shown more determination than in any other project I have worked on over the past 3 years. Iv found that I have a passion for working with ReacTIVision and creating Table based tangible applications. It’s an area of interactive multimedia that I enjoy so I feel I must help to share it with others in all its glory. The Reactable was something I had just stumbled across 8 months ago whilst doing some online research. I have always been keen on the idea of touch implementation but to see a group of people controlling touch functions but with tangible objects and shapes really opened my eyes and mind to something totally new. Research really isn’t one of my strong points and I don’t usually enjoy it but throughout the development of this project I have enjoyed interacting with other people with the same interest in ReacTIVision as me and its great to see what other people are being inspired to create.


Comparing the initial design ideas I had at the start of the project with the finished product, id say that I have certainly stayed in the same target area but the project has naturally developed in order to meet my needs and keep up with my skill development. The Beat box I think has turned out better in the long run then I had originally planned. In my proposal I had stated that it was going to be usable by all age groups, which it still is but if I was to place it out onto the market id maybe aim it more towards older teenagers and adults who are really interested in music creation.


It has developed into more of a live performance piece than a gaming installation although you could re program it for that.

The Beat Box has defiantly been improved from its original designs and has overcome my original expectations. It has really helped me evolve my methods of working and opened my eyes into new technologies along with giving me a new range of skills in a numerous amount software programs.
I’m interested to see what the future brings for me as I plan to develop more table passed applications and products.


Improvements:


The thing that really did bring a struggle to my project development was funding. To really improve on the quality of the build would be to apply or have some kind of funding, as these projects don’t come cheap. If things go wrong such as camera modifications or functionality then you are looking at starting over. When a camera costs £25.00 having to replace one really takes its toll. I underestimated the overall cost of the project and I should have really made a rough estimate or calculation before hand, but in the end I managed to scrap what I had together and made use of as many resources I could get hold of. With funding the overall finish of the box and cubes would have been a lot better. I originally wanted to use Perspex for the cubes and a better quality wood may have been nice. As I said before I managed to make use of what I had and the overall look turned out much better than I thought.


The biggest improvement that I would make it to use a high quality LCD screen instead of Perspex and a camera and use a different form of marker tracking.

A ReacTIVision project is a lot to take on as a single developer so having a team where each member assigned to a role such as tracking, visuals, sound and table build would defiantly have its benefits.


Future Scope:


What does the future hold for ReacTIVision development and me? Well I’m personally going to keep going with my newly found interest and skill with multitouch applications. I have already moved onto new ideas and begun my initial planning to make these ideas reality.

The new design works on exactly the same principle as the Beat Box but on a much larger scale. I plan to look into tangible bar applications that incorporate fiducial marker along with multi touch finger tracking. My idea features glasses that are used for specific drinks, which have a fiducial on the underside of them. When the glass is placed on the bar a small app appears telling the customer what drink they have along with its contents. I would also like to design an application to co exist with the drinks idea that allows customers to request songs from the in house music system by simple touching the bar surface in order to access the songs list and chart menu. No more crowds around a touch screen box to request songs and more customers to the bar.

Beat Box Project Evaluation (PART 1)


Jargon


TUIO - Stands for Tangible User Interface Object. 


MIDI - Stands for Musical Instrument Digital Interface


Fiducial - In this case, a fiducial is a symbol that is recognized by and interacts with the ReacTIVision software.


1.Problem Solving and methods of working:

Whilst working on the beat box project I found that I needed to upgrade my working methods and knowledge by introducing a lot of new research and interactive techniques. This was crucial for not only my project planning but also for my idea and skill development. I had to start from scratch with every piece of software and hardware that I have used throughout the past 6 months, ranging from computer programs to infrared lighting and diffuse illumination. Problems occurred throughout the project and were thrown at me from every angle. There were only 2 problems that I came across that really caused me any bother with the construction and creation of the Beat Box.

The first major issue I came across was the link I needed to create to connect the relevant programs. It took me a while to decide on which audio software I was going to be comfortable with in order to produce the adequate sounds for the table application. It was a case of trial and error and seeing what I could achieve within the programs. I started by experimenting in Ableton Live by using samples and trying to sort them into suitable functional sections.

These sections were to be assigned to each fiducial shape that is placed on the table surface. In order to link ReacTIVision with Ableton live I was to use the 3dmix max patch for Max Msp, which allows you to assign movement functions to each fiducial, such as vertical and horizontal faders, Control knobs and on/off states. The problem that I encountered was the link itself between ReacTIVision, Max Msp and Ableton which involves ReacTIVision sending TUIO (Table Top User Interfaces) which has to be converted in Midi signals in order for Ableton Live to receive and process the signals. It was this stage that my problems occurred and I just couldn’t seem to link the programs.

I then decided to try an alternative approach and concentrate on using Reason 4 instead of Ableton Live. It took another long period of time to even get to grips with the way in which reason works. Its one of those programs that looks relatively simple but really isn’t. The creators of reason have decided to make it as realistic to an actually amp rack as possible. This means the user has to create yet more links by flipping the rack around and physically wiring up the individual racks to effects etc. This made my job a lot harder but I managed to pull through.

Mapping fiducial functions In Midi rather than TUIO proved to be a lot easier in the program but required a lot of coding. To do this you have to edit an external XML file called MIDI.xml. This file is a command file and where in MAX MSP you can simply map using a patch you have to input commands such as:


Looking at the image you can clearly see which piece of code is relevant to each function.

After much playing about with reason I managed to assign fiducials to on/off functions on individual samples along with rotational knobs to control effects. You can find this in a preview Blog post (Sunday 24th January).

Midi seemed so promising but I had then realised “how am I to link the surface visuals using MIDI?”

It just wasn’t possible so I was to yet again re think my strategy if I was to create the perfect program link up to power the Beat Box. I reverted back to Ableton to chase TUIO progress. In the end I was able to create the link by accessing and setting up the IAC bus driver within the iMac preferences. An IAC Bus is a virtual MIDI bus that allows MIDI communication between applications. This enabled ReacTIVision and max Msp to link up via port 3333, which is the default port in which ReacTIVision processes its data. After sorting these links out I was then able to go on the assign all 14 cubes containing 86 samples altogether and have them working on the surface of the table.

Below is an image of Ableton live during the sample assigning process:


Below is an image of the table in its earliest testing form once the samples had been assigned:


The second difficulty that I ran into whilst creating the Beat Box was involving the Playstation 3 Pseye camera. I originally wanted to use two different spectrums of light inside the box in order for the projections to be seen clearly on the surface. I had the idea all planned out and I began to experiment by taking apart the pseye camera and extracting its infrared filter lens and replacing it with a piece of floppy disk. The floppy disk acted as a new filter, which cut out the light from the projector. This helps to give an even spread of light onto the underside of the table surface when using infrared. I then found out this method was yet to be used with fiducials and cubes due to not having an infrared reflective surface on the cubes. This caused a huge error and I had to re visit the normal camera solution with standard light, but to do this I had to spend out on a second camera in order for it to work. This put a hole in the bank funds but in the long run I now have an infrared camera for if I wish to look into multitouch finger tracking applications.


2.How the product works:

The Beat Box is a tangible sound device, which relies heavily on sound channels and processing. Users use blocks on the surface in order to change and interact with sound samples. Once a cube is placed down the shape of the sound can be seen on the surface projections, which take the form of a moving graphic equalizer. To be able to use the beat box a specific set up is needed in order for everything to work. This can either be acquired from myself or you can follow the small tutorial for the initial set up that I have included in this section.

Below is a list of the programs I eventually used with their corresponding functions and uses.

Software Purposes


ReacTIVision: ReacTIVision is a computer vision framework for the fast and robust tracking of fiducial markers via a camera. 


TUIO Simulator: A java application that simulates ReacTIVision, i.e. it simulates a real table so that you can configure all of the software without the need of a camera and a physical table set up.


MIDI Monitor: An application that intercepts all data being broadcast over the MIDI controller channel and notes what information is being sent. This is useful to monitor exactly what is going on between Max/MSP and Ableton Live. 


3dMix patch: A kind of application that runs inside Max/MSP because Max/MSP alone is useless, it needs to be instructed, that is what this patch does. 


Ableton Live: Ableton Live is versatile loop-based music sequencer software for Mac or PC. Used to produce and manage the sound samples.


Max/MSP: Max/MSP is a graphical development environment for music and multimedia. 


SoundflowerBed: SoundflowerBed is a Mac OS X (10.2 and later) system extension that allows applications to pass audio to other applications. It was used in The Beat Box project to create a link between Ableton live and Quartz Composer in order for the graphic equalizer to pick up and move to the incoming Midi signals.

Quartz Composer: Quartz Composer is a groundbreaking graphics development environment that allows you to explore the incredible power of the graphics stack of Mac OS X. Used to create the visuals for the table surface projection.


Once all the above software is acquired the necessary audio setup needs to me made.

Firstly the IAC Bus driver must be switched on via Applications>Utilities>Audio MIDI setup in the Mac finder window.

After this stage we can then move onto the initial program linking process. I will include a small demo tutorial in this section in order for others to follow in my footsteps.

Now open Ableton Live and load whatever set you like and apply the following steps to it

Next you have to configure the 3dMix patch in Max/MSP.
In this screen capture, I have labeled the different sections/variables you will be changing as A, B, C, D, E, F and G for reference purposes.


First, in section C, double click 'midi out b' to the right of 'curser' and select 'IAC Driver Bus 1'.Now do the same for 'midi out b' next to 'fid note' and 'fid cc'.

You might need a scaling curve for what you want to do with your table but in this instance, you won't so in section G, turn all 3 sliders to their left most position. Now in the Ableton's menu bar click Live>Preferences and hit the MIDI/Sync tab. Under the input section turn 'Track', 'Sync' and 'Remote' on for 'IAC Driver (bus 1)', and make sure all other options are off.

Now get the loops playing by clicking the play button next to 'Loops' in the Master channel to the right of the channels dialog.

Now in the Samples Dialog at the bottom you are going to be using the Transpose controller knob. If you can't see it, hit shift+tab and it should show up. The reason I am using Transpose as an example is because it makes a very significant difference to the sound so it is easy to tell if the TUIO simulator is reacting with Ableton. If you can't see the transpose knob and cant get it to show, use something else like the attack knob in a gate audio effect. Now you are going to set a fiducial in the TUIO simulator to control the Transpose knob in Ableton (or the attack knob)
To do this, first you have to set the Max patch up to accommodate for this.

In the patch, section B, set 'angle (Z axis)' to 'rotary (increment - decrement)' then set 'Rotary mode' to 'absolute (0-127)'

When testing you don’t have to use the TUIO simulator but it just makes up a lot of time if you haven’t already got a camera plugged into you computer via ReacTIVision.

Now you will be dealing with section E of the patch that controls which axis of each fiducial is packed as MIDI data and sent to Ableton.

The axis are as follows: say you have a fiducial on the table, we'll call this point zero. +X would be any value to the right of zero, horizontally. -X would be any value to the left of zero, horizontally. +Y would be any point above zero, vertically. -Y would be any point below zero, vertically. Z-axis represents rotation, so +Z is anything clockwise past zero and -Z is anything anti-clockwise past zero.

In this case you only want to track the Z-axis because you are only using the fiducial as a knob. I will be using fiducial 0 but you can use whichever you like. So in section E on the 0 column click the all the boxes except the last 2. This will put an X in each box, and therefore won't send any of the X or Y values.

The sensitivity of the fiducial is also important, if it's too sensitive you will only turn it a few degrees and the knob in Ableton will turn to its maximum value. To alter the sensitivity of Z axis (rotation) of the fiducials, use the 'Rotary' slider bar in section A of the Max patch. I found 520 is a good sensitivity for my needs.

Now in Ableton, click the MIDI button in the top right corner. This enables MIDI mapping mode, which allows you to set Ableton's controls to MIDI controllers. Having already set up the TUIO simulator as a MIDI controller using Max/MSP, You will now set fiducial 0 to the Transpose knob (or attack knob) by clicking the knob (after turning on midi mapping mode) then in Max, drop the blue square fiducial marked '0' onto the table surface in the TUIO simulator.

If you can still see Ableton running in the background, you should see a little green light flash next to the MIDI mapping button in the top right corner.
If you don't see this light flash, the simulator is not interacting with Ableton and you'll have to backtrack and see what you've done wrong (most likely, you haven't set Ableton or Max/MSP to the IAC driver).

The light flashing means that Ableton has recorded your action in the simulator and you will see 1/0 appear on the Transpose (or attack) knob. This indicates that the fiducial you dropped on the table (0) now controls Transpose (or attack). Now hit the MIDI mapping button again to turn off mapping mode and launch the new function.

Ensure your loops are playing and go to the TUIO simulator and turn fiducial 0(when it is on the table)
To turn a fiducial, right click it (or ctrl click) and drag upwards to turn clockwise (+Z) or downwards to turn anti clockwise (-Z) this should alter the transpose (or attack) knob in Ableton, and therefore drastically change the sound.
You can apply the same technique on any knob or setting in Ableton that is available in the MIDI map mode.

For example you might want to make a fiducial slide side to side and control a cross-fader. The only difference in this application is that you would set the fiducial to respond to X axis rather than Z-axis.
This is the first crucial step to set up the primary programs that control the function of the Beat Box Reactable.

The next stage would be to set up a high-resolution camera and link it to ReacTIVision. I recommend the PS3 eye camera for this as its what I have used along with many other people in previous projects.

The camera is simple to set up by plugging it in and downloading the necessary drive called Mac cam, which is totally free. This then registers the camera onto your computer and can be accessed as a usable cam in ReacTIVision.
If your using TUIO it should automatically register a fiducial when placed infront of the camera, otherwise your have to code it using the reactivision.xml file.

The general positioning of the camera is crucial to the functionality of the table. It must be placed face up and in the center position inside the box casing. This is so the fiducials can be clearly seen when placed at any point on the surface.

The main purpose of the Beat Box is to encourage users to experiment with new tangible interfaces in order to create a live performance music set. In order to do so the users are given 14 coloured cube's which are placed around the outside of the Box surface. The visuals are constantly moving on the screen in order to draw the user to the table. Once a cube is placed on the surface 1 of 84 possible samples with begin to play. 3 cubes can be placed on the surface (one of each colour) but if 2 of the same colour are placed down the first one will be cancelled out. If 1 of each colour is placed on the surface there will be 3 samples playing at once. This is where skill and the user ear will come into play as they will try to find beats which sound good together in order to create to own musical twist.

The visuals begin to replicate the beat patterns in the form of a 3D graphic equalizer, which has colours themed with the corresponding artwork. If a cube is lifted from the surface, the beat will continue to play until the same colour stop button is put on the surface. I chose to implicate it like this due to cubes possibly being knocked about and it could mess up the users beat pattern.

Wednesday 19 May 2010

Coming to an end

so im almost at the hand in date for the assignment and it couldnt have gone better. I need to upload a video of it working but that wont be on here till after the 4th of june due to i want it filmed at the degree show night in its full working glory.

i have a tone of images that need to go up on here . most of them just random shots from the working process but il add those once iv put the video up . Most of them are just duplicated of the images featured in previous posts but from different angles. I will throw them up on here any way just in case some of the other reactivision developers want to see things from a better angle.

oh i managed to create the final group of cubes that i will be using with the table . they turned out alot better than i had planned.

Here they are along with a photo of the finished Beat Box Project:


they were going the be perpex but i ran out of money :(

i think the overall cost of this built exceeded £200 . im yet to add up the cost but i dont think i want to know :D

Monday 17 May 2010

Finishing Touches

so the project is coming to an end and all thats really left to do is to make to final cubes and paint on the finishing touches like the logo on the box ,

below are some images i have taken off the logo in its design process and its finished state.


Im so happy with the outcome of the logo. i didnt think i had it in my to paint so well! i ended up using the flow of orange and pink that can be seen in the promotional poster in my previous post. It was sprayed on using a stencil that i had constructed. It was fairly difficult to get the right amount of colour spread to achieve the look i wanted but i managed it and it looks great !!


Wednesday 5 May 2010

VISUALS

so iv ditched the idea of flash and iv used quartz composer instead which can i say is just an amazing program . I didnt even know it was a free program with OS X. i have been messing around and come up with a few designs .. so here they are shown on the table surface.

They arnt too clear but its hard to get a good photo of a moving image.
The green one that you see below is the final visual i will be using. Its a 3d graphic equalizer that spins and chucks out Eq's in all different directions as the music changes pace.


Saturday 17 April 2010

Graphics

So i have been in contact with my cousin Andrew Fiddy ... please check out his work at

www.originalfiddy.com

(hes a wicked artist and multimedia designer)

We have had a chat and hes agreed to have a go at doing the branding for the Beat Box and i can now say the stuff he has come out with is so good. I couldnt be happier.

Heres the promo work and branding including a poster that i have had printed to be displayed on the wall behind the box.


Saturday 27 March 2010

A lick of paint makes a difference

so iv managed to start work on the paint job and graphics so heres a small update with a few images to give you an idea of how things are shaping up!

Friday 12 March 2010

Looking good!


so here are the finishing touches that i have started to put on the table. as you can see i have fitted the jbl 2x4 speakers into each side along with a fusion 400 watt amplifier. This Baby can kick out some power. I had it running last night at half power and it was shaking the windows :D

ahh well the neighbours cant complain as its for a good cause!


as you can see the cubes sit around the edge of the table perfectly and it gives the user enough space to work with .
the next stage is to get it all painted up and begin work on the graphics and display work . il post that up over the next few weeks as it happens.

Thursday 25 February 2010

Just a build update

so here is a few more photos of the box like i promised. It has the lid on complete with the glass surface and im now moving onto fitting the insides along with the 400 watt jbl sound system.


Monday 15 February 2010

Build me a BEAT BOX??

the build had started on the box structure and i cant wait to get it back to my house to set it up .
its all getting a little exciting now . Its nice when hard work pays off and things go smoothly.

il post up a couple of posts over the next few weeks to show you to build progress.
it should'nt be long now until i can really have a proper play with it!

Friday 5 February 2010

Camera has arrived and progress update


so the ps3 camera arrived today and i have begun to test it out under the test table. its reading the fiducials with no problem at all and its helped me to kick things off to a great start.

I have also made a group of 14 mock up cubes and iv started to map all the relavant sound samples to them.,

Iv got 8 fully mapped and they work great on the surface of the table.

Thursday 28 January 2010

AND ONE MORE THING!

just ordered the ps3 eye camera to use within the table, it will also make testing alot easy due to having to use the built in Imac cam at the moment.

Im going to have to remove the infrared filer from within the ps3 cam when i get it so il most likely post up a video or step by step on how to do so .. :D

Things are never easy

Hello again , Over the past few days i have had some highs and lows with the production of my reactable,

firstly i had managed to get reactivision sending Midi which enabled me to successfully have reason 4 linked up with it. this gave me great joy in being able to have fiducials on screen and triggering samples from within reason , it also enabled me to control the mixing desk and effect knobs etc.

I have also been having to really think about how i am going to produce visuals to go along with the sounds. my only option i think is to use flash.... but to use flash i would have to have reactivision sending TUIO signals to Max/msp and then link into flash that way . so today i have been messing about trying to create this much needed link . Iv found it such a hard thing to do due to not having worked with this kind of stuff before.

Im please to say i have reactivision sending TUIO and Max/msp is receiving it! this also creates a problem of how will i get the sounds to trigger as they were being picked up with midi instead of TUIO. hmmm its a hard one and i will need to do alot of thinking and playing around in order to work it out..

I shall report back on this soon...... :/

Sunday 24 January 2010

Video Evidence

Heres that video i promised.

my first real breakthrough with the programs and i cant wait to get going on the rest!


Thursday 14 January 2010

We Have Lift Off!


So after a few weeks getting used to reason 4 which i can say wasnt easy. i have managed to create a reactivision midi controller for the program and have got to grips with the XML coding involved with the vertical/horizontal faders,knobs and On/off states.

below is my code at its current state just to give you an idea on what goes on inside the reactivison command file.


i shall upload a video in the next few days to show you to end product from this section of code.

:D

Monday 4 January 2010

Trial and ERROR!

hello again.

so iv been recently working on my project and iv managed to land myself waist deep in a rut.
I cant seem to link reactivision with Ableton live as a midi device in order to control elements and certain functions within the program .

but.... im not going to give up.

i had a back up plan and i managed to get my hands on a copy of reason 4. to my surprise i was easily able to make a custom device slot and register reactivision as a midi control device.

as for the rest? i shall get back to you soon on my progress!